|
ON THIS PAGE:
Batteries
Tapes
Hints and tips
Colour bars
|
 PART
3: BATTERIES AND TAPES PART
3: BATTERIES AND TAPES
by Christina
Fox
|
BATTERIES
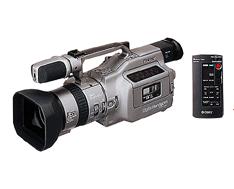
There are two types of battery for the VX1000 camera:
- LITHIUM BATTERIES - The tiny lithium battery powers the camera's
memory and its clock. It is located in the door to the main battery
compartment and will last for at least 12 months.
- RECHARGEABLE LITHIUM ION BATTERIES - These batteries
power the camera and the recorder. To change the battery on the camera
first OPEN the back panel, then RELEASE the battery.
AS PART OF YOUR KIT YOU SHOULD HAVE:
- at least three rechargeable batteries
- a battery charger which plugs into the mains.
|
|
RECHARGING TIME and BATTERY LIFE
So, how long does a battery last and how long will it take to recharge?
|
Battery Type
|
Operating Time
|
Recharge Time
|
|
NP-720
|
40 mins of typical use
|
190 mins or 4 hours if you
|
|
NP-F730
|
"
|
charge two at a time.
|
The old Nickel Cadmium rechargeable batteries would deteriorate if they
were constantly charged before being fully discharged. Lithium
Ion batteries do not suffer in this way and so can be "topped up"
whenever you need to.
|
|
ALTERNATIVE METHODS OF POWERING THE CAMERA:
- You can use the AC power adapter and power the camera from the mains.
However this will restrict you to shooting indoors!
- You can power the camera from a car cigarette lighter socket using
a DC-V515 (not supplied) but again this does kinda restrict your shooting
range
|
|
TAKING CARE OF YOUR BATTERIES
- Batteries work best between 0°C and +40°C so try to keep them in a warm
place when working in cold conditions.
- Keep batteries away from intense heat (+ 60° C).
- Protect from vibration, do not drop them.
- Do not immerse in water, expose them to heavy rain, steam or high humidity.
If they do get wet remove any excess water and allow to dry naturally.
- Label your batteries A, B, C (etc) and use them in strict rotation. This
way they will all get equal use (and abuse).
- Do not put batteries in a pocket or bag with your keys, coins or any other
metal objects. Keys touching the metal contacts of the battery can get hot
and you may set your pants on fire!
Back to the
top.
|
TAPES
At the heart of the recorder is a rapidly rotating drum, set at an angle,
with the recording heads mounted on it. The tape is wrapped around the
drum as it is loaded into the recorder. As the tape passes across the
drum, the heads convert the electronic video signal from the camera into
magnetic pulses and 'write' the signal onto the tape. The sound heads
are also mounted on the drum and the hi-fi audio signals are encoded in
the picture track.
DV uses a small format cassette. The tape is only 5mm wide and available
in 30, 60 and 90 min lengths.
DON'T LEAVE TAPES:
- in the sun, on radiators or near car windows on hot days
- in a cold place then move them somewhere warm as moisture will condense
on the tape
- near a magnetic field (e.g. hi-fi speakers and electric motors)
- where they'll get wet
- where they'll get dusty or dirty
- in the player for long periods of time
Back to the
top.
|
|
HINTS AND TIPS
- The start of the tape can become mechanically damaged in manufacture
when it is secured to the spool. Try not to use this possibly damaged
tape by recording colour bars or something unimportant for the first
minute. If there are time constraints fast forward through the tape.
- Ideally you should record around 1minute of colour bars (see below)
and 1KHz tone at the start of the tape. This can help to identify
camera faults.
- Don't try to flip the cassette over to record on both sides - it won't.
Plus, you'll damage the tape transport mechanism.
- Make sure you have plenty of tapes with you at all times.
- Don't be tempted to touch the tape, the natural oils on your fingers
will damage it.
- Label each tape with the date, story name and the camerawoman/man's
name - a simple description of what you've shot on the box may save
time later in the edit suite.
- As soon as the tape is taken out of the machine, engage the protection
tab to prevent someone accidentally recording over your story.
|
|
 PUTTING
COLOUR BARS ONTO THE TAPE PUTTING
COLOUR BARS ONTO THE TAPE
It is a good Idea to record about a minutes worth of bars (and tone -
if you have it) at the start of each tape.
For some strange reason Sony neglected to tell its customers how to find
colour bars on the camera. Check the manual - it just isn't there. But
it is here.....
- Switch the camera to CAMERA MODE
- Turn the Start/Stop button to LOCK
- Hold down the PHOTO button
- Then hold down the red RECORD button, and simultaneously switch
from LOCK to STANDBY.
Back to the
top.
©
2000 - 2010
|
- Move on to...
- Part 4: TRIPODS
- Or back to...
- Part 2: MANUAL OPERATION
|
|
|
|
Christina Fox
|

