|
ON THIS PAGE:
Sound
Inputs
Sound levels
Hints and tips
Types of microphones
|
 PART
8: SOUND LEVELS PART
8: SOUND LEVELS
by Christina
Fox
It is quite easy to concentrate
so hard on getting the pictures right that you end up forgetting about
the sound. Remember, no matter how exciting the pictures are if there
is no accompanying sound the impact will be lost.
|
|
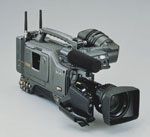
The DSR 500 gives you the ability to record either:
- The built in (unidirectional) Front mic to channel 1 and/or 2
- An external microphone to channel 1 and/or 2
- A line level feed to channel 1 and/or 2
|
INPUTS
There are a vast array of microphones available. Obviously I don't know
what microphones you have but here are a few general hints and tip.
- Two sound sources can be recorded on the two separate sound tracks
simultaneously. They are plugged into the microphone sockets below the
camera battery
- It is good practice to keep your "good sound" on channel
one and leave the front microphone set to record on channel two. Label
your tapes so that editors know what sound you have recorded on which
channel. Otherwise they may use your back up track rather than your
good stuff.
- Some microphones require phantom powering (usually a AA battery) the
camera can also phantom power microphones. If you are not sure if a
mic does take phantom powering. Plug it in without power - if there
is no output - then select MIC +48 V to see it that solves the
problem.
- At the back of the camera it is possible to connect your own sound
source. This will usually be a microphone. But, it could be the output
from a PA system or something similar. Beware - NON microphone sources
are usually fed to the camera at high level (i.e. line level - see below).
Once your sound source is connected there are three options to choose
from...
- LINE – an input that is not a microphone, but some other
source (set at +4dB)
- MIC – an input that is a microphone (set at minus 60dB)
- MIC +48 V – some microphones require phantom powering. This
selection provides 48 Volts
|
SOUND LEVELS
To adjust the recording levels use the CH 1 and CH 2
audio level controls.
The audio levels should be monitored:
- By using the headphones – whose volume level can be adjusted using
the audio Monitor level control
- In the Display window – Peak levels should not exceed minus
3dB voice levels should be between minus 20 dB and
minus 12dB
- Through the viewfinder – voice levels should show on the viewfinder
indicator at around minus 20dB which is about 4 squares in the
viewfinder
|
HINTS AND TIPS
- Buy a set of headphones for your kit - and use them. It is the only
way of really knowing if the sound is being recorded at the right level/any
level!.
- Get the microphone as close as possible to the sound source - this
may mean the microphone will be in shot.
- If you have time, record 30 seconds of 'atmos' i.e. the natural background
sounds at the location.
- If you must record in a noisy area (e.g. beside a busy road or in
a factory) make sure you have a shot of the source of the noise. Viewers
will put up loud background noise if they know where the sound is coming
from.
|
TYPES OF MICROPHONES
I WILL BE ADDING TO THIS SECTION LATER - YOU'LL FIND INFO ON...
- OMNIDIRECTIONAL MICS
- CARDIOID MICS
- HYPERCARDIOID MICS
- FIGURE OF EIGHT MICS
Back to the top.
©
2000 - 2010
|
- Move on to ...
- Part 9: LIGHTING
- ...or go back to
-
- Part 7: TIME CODE
|
|
|
|
Christina Fox
|
