|
ON THIS PAGE:
Power
Start/stop
Zoom
Auto lock
Auto focus
Steady shot
Edit search
Pre flight checks
|
 PART
1: GETTING STARTED PART
1: GETTING STARTED
by Christina
Fox
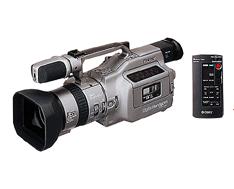
Listed below are those buttons you really need to get to know- in order
to start shooting quickly. Once you are happy with these - Move on to
Part 2 and learn how to operate the camera
in manual.
|
POWER ON / OFF - back of camera top left
- Rotate the large round button to PLAYER while depressing the
locking button in the middle. The camera should bleep and the transport
controls illuminate - you can use the player/recorder to review your
tapes by operating the STOP, REWIND, PLAY, FAST FORWARD and PAUSE
buttons.
- Rotate the large round button to CAMERA while depressing the
locking button in the middle. - you have now selected the camera and
the recorder (you will not have a picture until you select STANDBY-
see below).
Back to
the top.
|
START / STOP - under the right thumb when
the camera is hand held.
This is a red button with a black rotary control around it. It has three
positions.
- LOCK is off.
- STANDBY turns the camera and recorder on.(If you still
cannot see a picture in the viewfinder check that you have removed the
lens cap.)
- PHOTO STANDBY is for taking stills only and should
not be selected if you wish to record moving pictures.
TO START RECORDING
press the red button, the message REC will appear in the viewfinder
(plus the red tally lights will come on and the time code will start counting)
TO STOP RECORDING
press the red button again, the message STBY will appear in the
viewfinder.
NB when there is a tape in the camera it will automatically turn itself
off every five minutes. You can turn it back on by switching from STANDBY
to LOCK and back again.
Back to
the top.
|
POWER ZOOM
- The 'T' stands for TELEPHOTO and will zoom the lens in.
- The 'W' stands for WIDE-ANGLE and will zoom the lens out.
The Power zoom has two speed levels. Press gently to zoom in slowly -
press firmly to zoom in quickly.
NB the 20:1 zoom facility combines a 10:1 optical zoom with a digital
doubler. The camera will work with or without the digital doubler. It
is advisable to turn it OFF as it degrades the picture considerably (to
do this go into the camera's MENUS) .
Back to
the top.
|
AUTO LOCK
- When the HOLD/AUTO LOCK switch is in AUTO LOCK position
- the camcorder will automatically adjust the WHITE BALANCE, SHUTTER,
EXPOSURE/GAIN and SOUND RECORDING LEVEL.
- With the HOLD/AUTO LOCK turned to the middle position you have
the choice of operating the above features manually or on auto
- To retain the settings you have adjusted manually, turn the HOLD/AUTO
LOCK to the HOLD position.
Back to
the top.
|
AUTO FOCUS
- With the FOCUS switch set to AUTO the camera will automatically
focus for you.
- Set the switch to MANUAL to take control of focusing - the
symbol
 appears top and centre of the viewfinder.
- The PUSH AUTO button below will automatically focus the camera
on whatever is in the centre of the picture. When you release the button
it will revert to the manual mode.
- When the FOCUS switch is held in the INFINITY position
the camera automatically goes to maximum focal distance and a mountains
symbol appears in the viewfinder top centre. When you release the switch
it reverts to the MANUAL position.
Back to
the top.
|
STEADY SHOT
- This is an optical means of compensating for camera shake.
- You can switch it on/off with the STEADY SHOT switch - located
on the bottom left of the inside of the battery compartment door.
- When switched on - the
 symbol appears on the left of the blue strip in the bottom of the viewfinder
- It should be switched on in most circumstances because even lightweight
tripods are inherently unstable.
For a great explanation on how image stabilisers work take a look at
this from the tvcameramen.com
site.
Back to
the top.
|
EDIT SEARCH
- Momentarily holding down the EDIT SEARCH rocker marked "-"
allows you to look at the last two seconds of the last picture you recorded.
- By holding down the "+" or "-" side of the edit
search you can forward or rewind through the tape. (The harder you press
the faster it goes.)
- Be careful when you use the edit search facility. If you forward onto
blank tape then start recording, the camera will reset timecode
to ZERO. Always cue up on the last recorded picture to ensure you have
continuous timecode throughout your rushes.
Back to
the top.
|
PRE FLIGHT CHECKS
- Always check that the viewfinder is in focus.
- First of all make sure the lens cap is in place. All you should be
able to see in the viewfinder is the blue strip along the bottom which
houses the time code details, and battery symbol.
- Under the rubber eye cup, on the viewfinder, you'll find the viewfinder
lens adjustment ring.
- Turn the ring with your thumb until the battery symbol in the blue
strip is completely out of focus.
- Slowly bring the battery symbol back into focus. You may find it helps
to rock the ring backwards and forwards – until your sure that
the symbols are in perfect focus.
- Check all of your batteries – you should have at least three
fully charged camera batteries in your kit along with some spare AA
batteries for your microphones.
- Make sure you have enough tapes with you.
- Check the tripod hot shoe matches the tripod. You cannot
mix and match one manufacturers hot shoe with another manufacturers
tripod.
- Adjust the Velcro fastening on the side strap until it is comfortable
for your hand size.
Back to
the top.
|
- Move on to...
-
-
- Part 2: MANUAL OPERATION
-
|
|
|
|
Christina Fox
|
