| ON THIS PAGE:
Pre-shoot check lists
LCD screen
In need of some Z1 or FX1
camera training? We offer
one-to-one personal training
and
training for groups.
More info...
|
 PART 1: GETTING STARTED WITH THE SONY HVR-Z1 PART 1: GETTING STARTED WITH THE SONY HVR-Z1
by Christina Fox
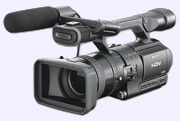
The HVR-Z1 is Sony's professional 16:9, 3 CCD camcorder. It can record in HDV, DVCAM and DV. Sony have a similar prosumer version called the FX1. There are around 40 differences between the two but the easiest way to tell them apart is that the Z1 has two XLR sockets on the side of the camera to take professional microphones, plus two rotary audio controls on the back - the FX1 does not.
WHERE DID HDV COME FROM?
HDV is a new recording format developed by a consortium of manufacturers including Sony, JVC, Canon and Sharp. In fact JVC produced the first single-chipped HDV camera, the GR-HD1.
There are a large number of companies that support HDV, including Apple, Avid and Adobe. There is a full list at www.hdv-info.org.
WHAT IS HDV
The HDV video format records High Definition pictures onto a
standard miniDV or DVCAM tape. The Z1 records 1080 lines of resolution.
However, not many of us have a high definition TV to watch these pictures, so the camera also has an inbuilt down converter. This takes the HDV signal and converts it into an SD signal we can all watch with our current TVs. |
| This a basic pre-shoot checklist to make sure you're ready to start recording.
Obviously your mileage may vary and you'll need to adapt this checklist to suit your own shooting style and workflow. But, hopefully it should get most cameras ready to shoot - whatever your project.
CHECK THAT ALL THE EQUIPMENT IS IN THE KIT
- Especially the tripod/camera plate
- Does the camera actually fit on the tripod?
- Are the batteries charged – do you have enough batteries?
- Take the charger with you
- Have you got enough tapes – are they the correct type?
DOES EVERYTHING WORK?
- Put the battery on the camera
- Turn camera on
- Focus eyepiece for your eye using the on screen markings
- switch to peaking or zebras
AUTO OR MANUAL?
- For full auto...
- - set camera to auto focus and auto lock
RECORDING
- Choose which recoding format you will use HDV, DVCAM or DV
- Set time code – usually to rec run
- Set user bits if necessary
- Insert a tape
- Record 30 sec – 1 minute of colour bars (and tone if you have an external source)
- switch off colour bars
CHECK SOUND MENUS
- In the audio set menu check...
- Mic Select is set to XLR if you are using separate mics
- XLR set input = mic (for a mic input)
- XLR set input = Line (for a mixer input)
CHECK SOUND SWITCHES
- Do your mics need phantom power - switch is beside XLR sockets
- Are you going auto or manual?
- Set CH1 – auto or manual
- Set CH2 – auto or manual
HEADPHONES
- Plug in headphones
- Go to audio set menu and select audio moni to listen to CH1 and CH2
- Set headphone level
MICROPHONES
- Connect mics and test them
- Put new batteries into radio mics
- Have you enough/spare microphone cable, wind gag, personal mic clips, headphones.
WORKING OUTSIDE?
Switch Off – pack up gear and get to the location!
|
